Setting Timezone Automatically
Enable automatic updating of the system time zone based on the device location using InTune


Since not everyone lives in Redmond, we generally want to deploy a new device with it's time zone set to the local time zone.
Unfortunately, guiding users to set the local time zone isn't always the best solution, and since we have InTune available, lets use that!
The solution is a two part process:
- Enable location services so that the geo-location can be used to determine the time zone
- Set the tzautoupdate service to start so that it can take the location and update the time zone
Enable Location Services
In InTune, create a new configuration profile for Windows. Set it to "Settings Catalog".
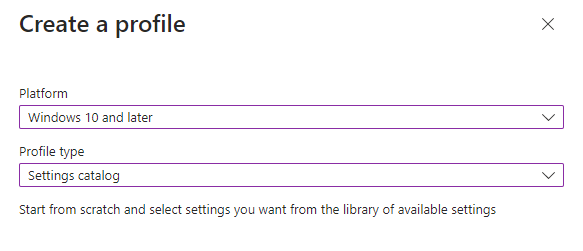
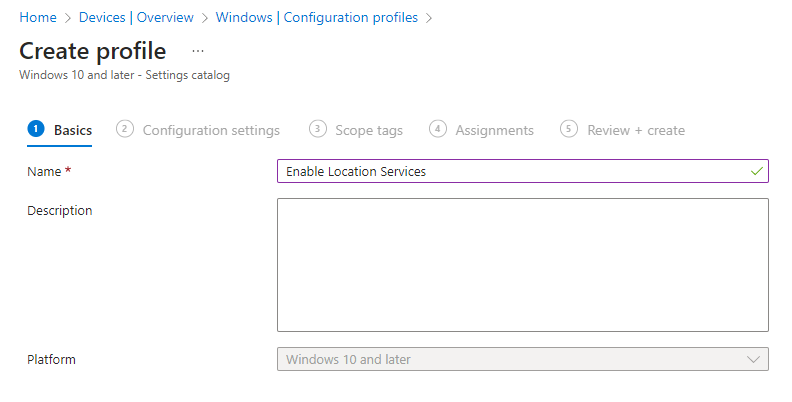
Give the profile a name
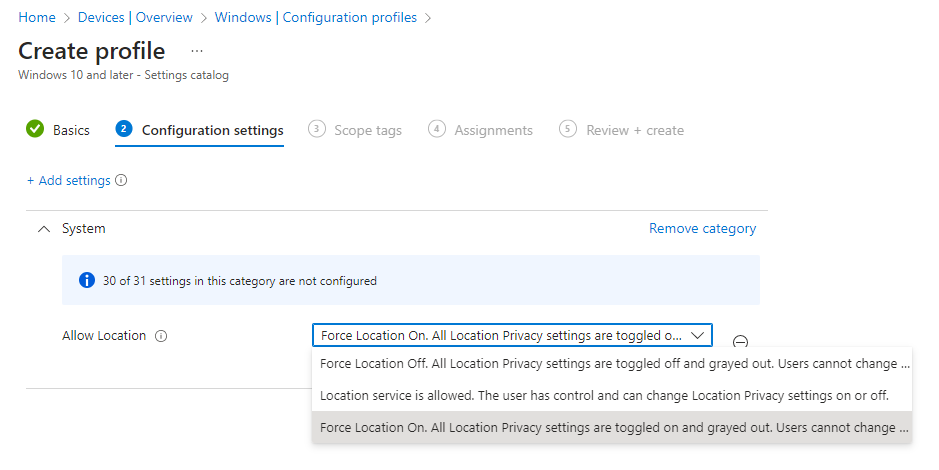
Click next, and then "Add settings". From the slide out panel, search for location and select the "System" category
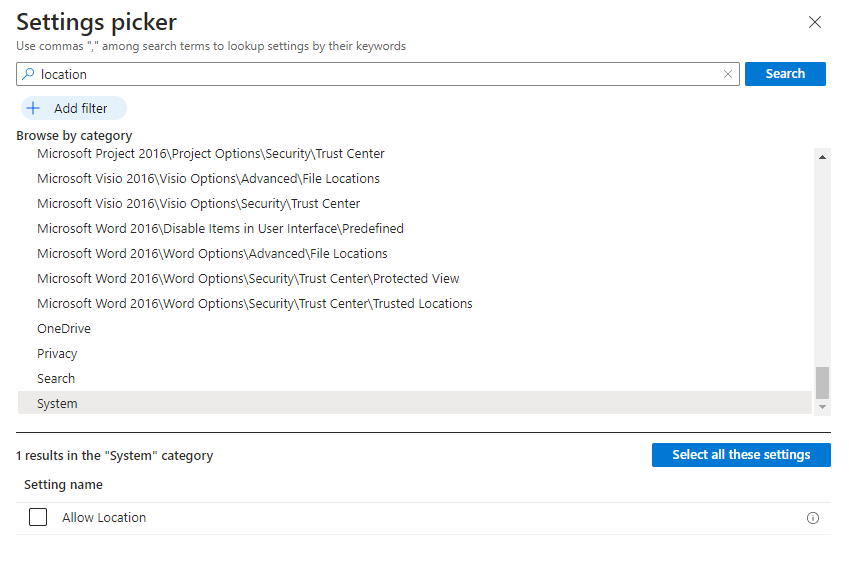
Check the box for "Allow Location". The configuration setting will then appear on the left of the page
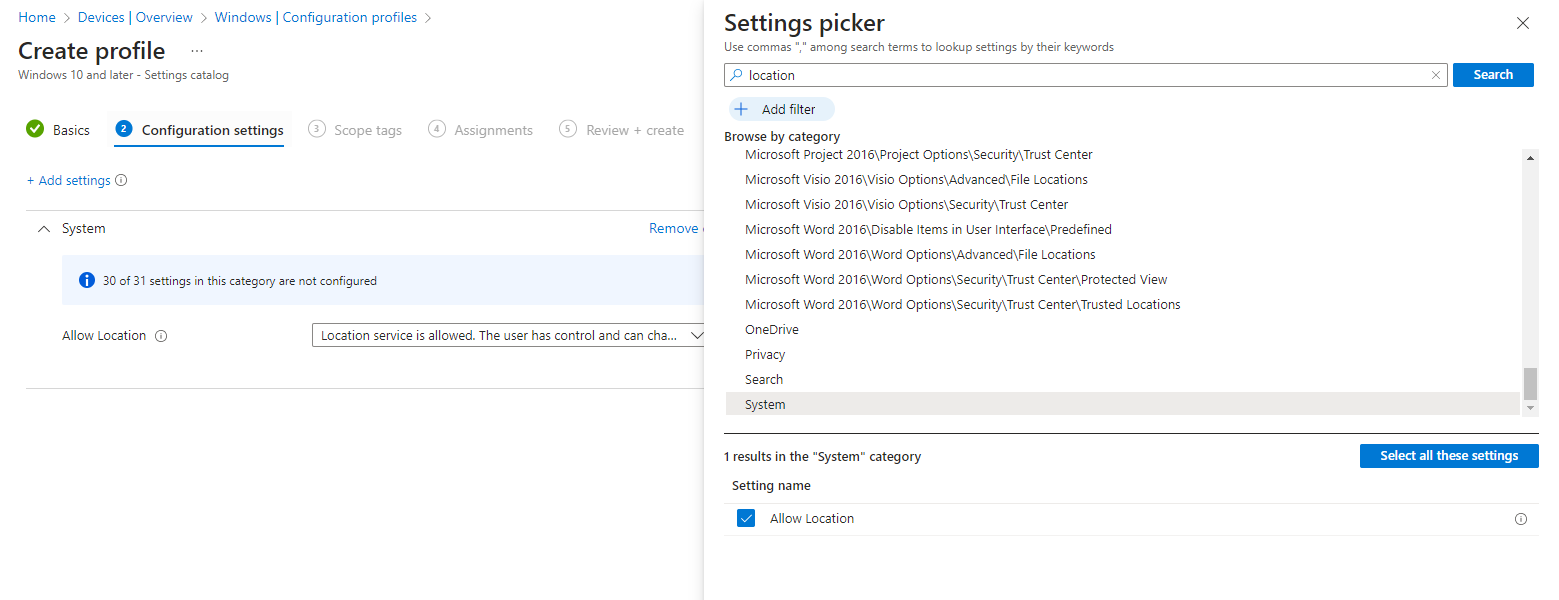
Set the "Allow Location" value to "Force Location On. All Location Privacy settings are toggled on and grayed out. Users cannot change the settings and all consent permissions will be automatically surpressed."
Click Next, and assign the appropriate Scope Tags
Click Next, and assign the profile to the appropriate groups
Click Next, and review the settings before clicking Create
Done!
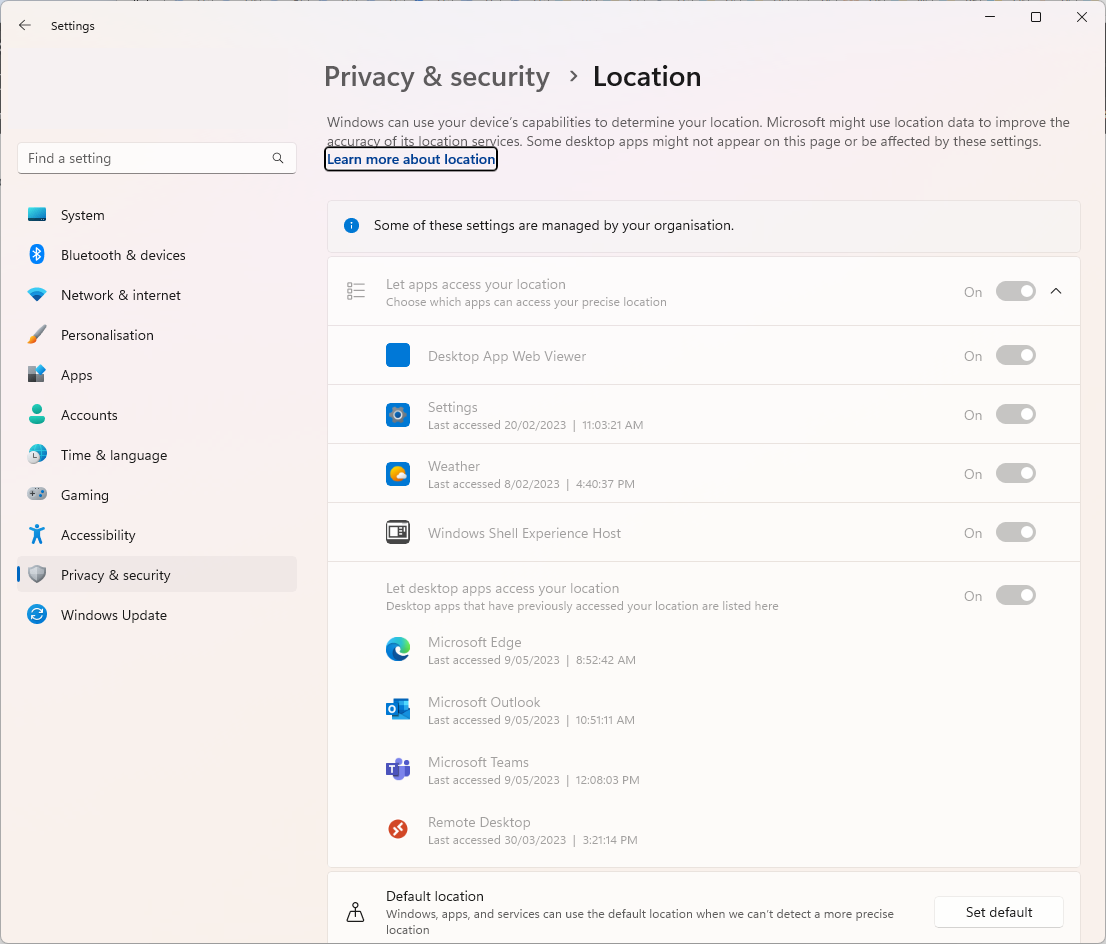
Now when a user goes to the location settings in Windows settings, it should look similar to this:
Enable the tzautoupdate service
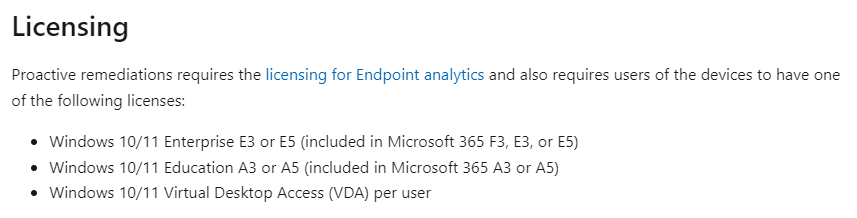
This part of the process can be done using a Proactive Remediation, and is probably the easiest way to do this - however, Proactive Remediations are behind a license that not every one has. From https://learn.microsoft.com/en-us/mem/analytics/proactive-remediations:
A way to work around this is to deploy the script as a win32 packaged app using the IntuneWin.exe tool (https://github.com/Microsoft/Microsoft-Win32-Content-Prep-Tool) and some PowerShell.
Create a script with the following contents:
Set-ItemProperty -Path HKLM:\SYSTEM\CurrentControlSet\Services\tzautoupdate -Name Start -Value "3"
Start-Service tzautoupdate
This script sets the tzautoupdate service to manual start and then starts the service to set the time zone immediately.
Save the script as "install.ps1"
Create another script with the following contents:
Set-ItemProperty -Path HKLM:\SYSTEM\CurrentControlSet\Services\tzautoupdate -Name Start -Value "4"This script sets the tzautoupdate service to disabled.
Save the script as uninstall.ps1
Put both scripts into a folder called "TimeZoneAutoUpdate".
Start a command prompt, and run the following command:
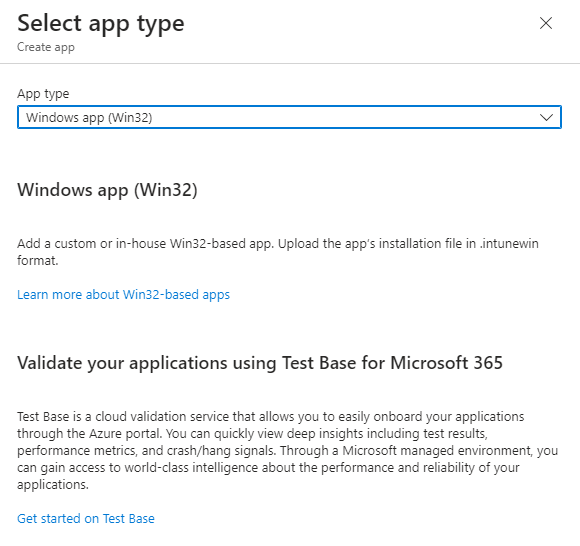
C:\Support\Microsoft-Win32-Content-Prep-Tool-1.8.3\IntuneWinAppUtil.exe -c .\TimeZoneAutoUpdate -s install.ps1 -o .\In InTune, go to Apps -> Windows, and click the "Add" button.
In the slide out, set the app type to "Windows app (Win32)"
Click "Select"
Click "Select app package file" and in the slide out, click "Select a file"

Locate the install.intunewin file you created earlier and click "OK"
The "App information" tab will populate. Give the app a name and a description:
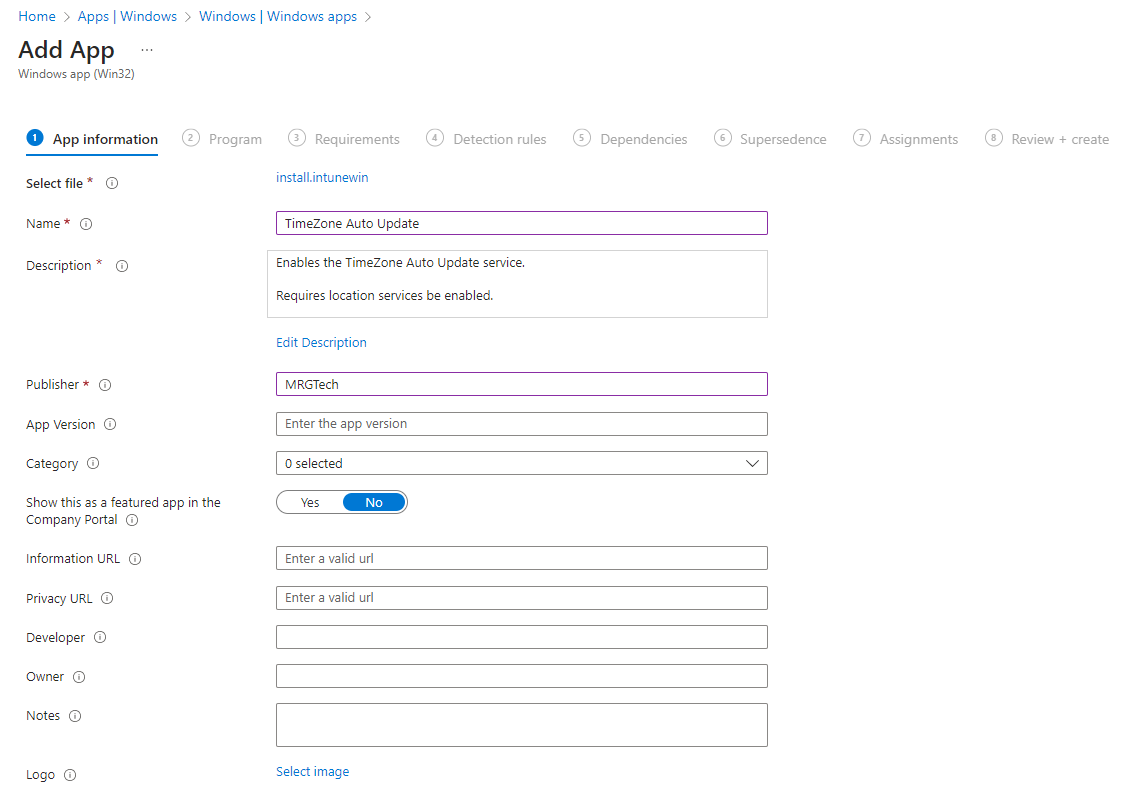
Click "Next" when done.
Set the "Install command" to:
powershell.exe -executionpolicy Bypass -windowstyle hidden -file .\install.ps1Set the "Uninstall command" to:
powershell.exe -executionpolicy Bypass -windowstyle hidden -file .\uninstall.ps1Click "Next"
Set some basic requirements such as the CPU architecture, and the minimum operating system and click "Next"
On the "Detection rules" tab, set the "Rules format" to "Manually configure detection rules" and click "Add"
In the slide out, set the following:
| Setting | Value |
|---|---|
| Rule type | Registry |
| Key path | HKEY_LOCAL_MACHINE\SYSTEM\CurrentControlSet\Services\tzautoupdate |
| Value name | Start |
| Detection method | Integer comparison |
| Operator | Equals |
| Value | 3 |
| Associated with a 32-bit app on 64-bit clients | No |
Click "OK"
Click "Next" until the "Assignments" tab is displayed.
Assign the app to the appropriate groups, and click "Next".
Review the app settings, and click "Create" when ready.
Done!